

If you missed Part 3, check it out here.
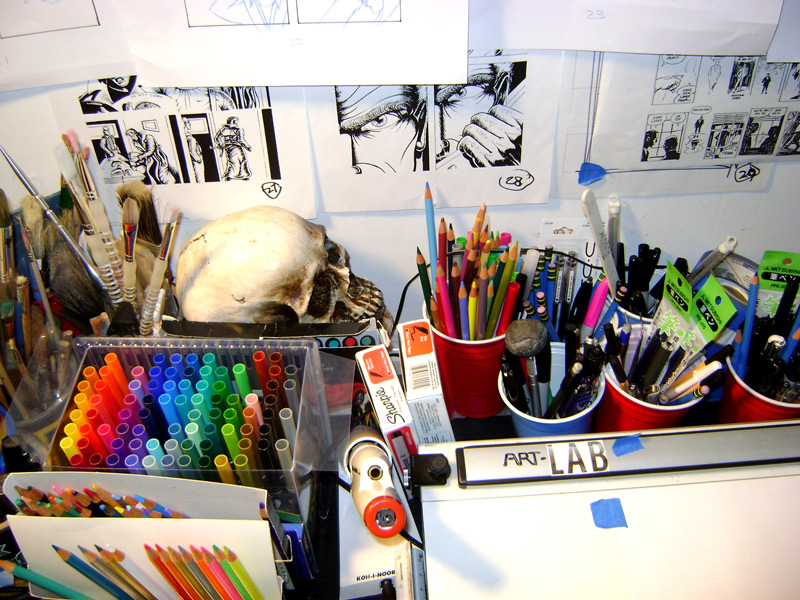
Step 4: Drawing supplies and tools I use to make a comic book and graphic novel:
As an artist you probably already use a range of pencils, pens, rulers, erasers etc… over the past 30 years, I have amassed a large collection of just about every kind of drawing implement you can think of. I will share with you my favorites, and the ones I think you should use to get started on your graphic novel. If you already use something different, fear not, draw with what you are comfortable and familiar with.

I try to approach using and buying pencils, pens and other tools with three simple rules. Easy to get, price is right, easy to use.
The whole point of using the right tool for the right job is that the tool will help you get the job done with minimal problems. The tool should almost be invisible; it is an extension of your talent and skill. If you have to think about how to use it or change your style completely to use it, maybe you need to put it down. Once you get into drawing your graphic novel, your choice of drawing tools should be seamless and everything should flow without hesitation. Because, you have a long road ahead and the last thing you want to do is change drawing tools midway through your project. Figure it out now and you will be much happier later.
I am by no means a Pen or Pencil expert; I leave that to Brad: http://penaddict.com/ and Fisk: http://www.penciltalk.org/


However, what I can tell you is that I have used many different pens and pencils boiling them all down to what you see here. Traditionally, “Back in the day” comic book artists used a range of quill pens that they dipped into vats of ink and various other methods that leave room for a lot of mistakes. I too started out with this method, but over the years, I've experimented with new materials, and pen technology has reached a truly amazing, sophisticated level. I don’t think it's necessary to dip a pen into ink wells and worry about ink blotches, dripping, drying and myriad other problems from these older methods. If you are a truly traditional artist and have your heart set on it, then go for it, but the older methods have a pretty hefty learning curve if you are just starting out.
I approach my drawing for graphic novels in several steps and I use different tools for each step.
Tool Chart: Here is a list of all of the tools I use for my graphic novels and how I use each one with an example, and where to buy them.
1) Character design: I use whatever I want/have at the moment of inspiration. The character design process is for me and me alone. I am not making presentation boards for Marvel or DC Comics; these are my rough ideas. They are for me to get a look and feel of the character, think about costumes, etc… At this stage, I often use whatever I have available. Typically, I use a mechanical pencil with a .007 lead because I sketch on the train there is no time for me to sharpen pencils. Sometimes I use a sharpie for heavy lines, and sometimes I use my Ticonderoga Erasable blue 420T. (I’ll talk more about these below in the examples.)


The black one here is my mechanical pencil, which is cheap and easy to use. The .7mm replacement leads and erasers refills are a cinch. This pencil is the Pentel Twist-Erase III Automatic Pencil, 0.7 mm, Black
 . The blue pencils are the best, I use these like I breathe. I take one with me everywhere. They're easy to erase unlike some of the other so called erasable pencils, and the price is right at $7 and change for a dozen pencils that's pretty good, because you will use a lot of them. Dixon Ticonderoga Erasable Blue Pencils.


In Fig. 1, The astronaut was drawn with a Pentel .7mm lead above. Fig. 2, Is the cover image of the first issue of Prisoner of the Mind drawn with the Dixon Ticonderoga Erasable Blue.
2) Thumbnail sketches: of each panel before storyboarding: (same as above) I usually use a mechanical pencil with .007 lead. The lighter .005 lead breaks to easily for me, because I am a heavy-handed artist pressing down snaps these lighter leads quickly. If I had my choice, I would probably use trustee #2 yellow pencils but as I said before, I don’t have time to deal with sharpening them.

3) Rough Storyboarding/Panel Layout: Only Dixon Ticonderoga Erasable Blue Pencils (same as above). This pencil meets all of my needs as far as my three simple rules. Easy to get, price is right, easy to use.

4) Final storyboard: (Same as above) Only Dixon Ticonderoga Erasable Blue Pencils. Using a blue pencil like this makes the clean-up very easy, it is also very easy to go over with ink when I get to the final step below. A lot of professional comic book artists use a regular series of drawing pencils for this stage. 2mm to 4mm leads in HB to 6B range or even good ol number 2. However, sometimes it makes clean-up and inking more difficult which is why I prefer blue pencil to standard graphite.

5) Final Ink/Clean Up: For outlining over your blue pencil drawings you need a pen that acts like a pencil. It feels hard when you press down, you can feather it easily and it doesn't bleed too much because you don’t want to redraw the whole damn thing. When doing final ink I use a series of pens to get my results. You can check these out below.
Here is the blue pencil cleaned up of this cover image.

Here is the inked version.

And this is the full color digital paint after it's been scanned.
The Sharpie Pen, Fine Point: The perfect pen? Well, sort of.
Let me start with this, I personally love Sharpie pens, I grew up with them, and I'm sure you have seen a sharpie at some point in your life. The black ink is very consistent and looks great even after ten years. I can attest to this because my graphic novel has taken at least 16 years to make and even my early work hasn't faded. The tips are strong and they last quite long. They are a solid American brand, but they have some problems. Sharpie started out with a wonderful waterproof marker that was primarily used for industrial purposes, you could write on fabric, boxes and many other materials that other markers couldn't compete with. They were the only game in town when it came to that. However, Sharpie didn't know what they wanted to be when they grew up. They've been trying to be an art marker and an industrial marker manufacturer too. But, one of the biggest problems is that Sharpie’s tip sizing is screwy. They need to do away with the whole thing and start over even with a simple 1, 2, 3, etc… to really get the attention of professional artists that don’t already use their products. Here is the example below:

Japanese pens are huge in the Comic book industry, because they understand correct tip sizing for the professional artist. You don’t have to guess, I think if sharpie wants to be a contender in this field, they need to make some changes.
There is one other problem too. The Sharpie pen below is my beloved personal favorite for outlining all of my comics and illustrations. The pen is well balanced, it feels nice in your hand, the ink lasts a long time, the tip is firm and it almost writes like a pencil, and doesn’t bleed too much. You can find them at any office supply store anywhere. I’ve tried the Copics and many others, but this Sharpie Pen meets all of my criteria. Easy to get, price is right, easy to use.


When this pen first came out it had the first tip above on the left. Over the past few years, Sharpie quietly changed the tip from the one on the left to the one on the right, there is nothing on their blog about either. Shame on you Sharpie! It's not the same pen. The newest version of this pen bleeds a little more than the original. I had to change the way I use it to outline my drawings.
Sharpie Pen Fine Point Pen , 4 Black Pens (1742661) . It's still a really great outline pen and the price is right, for 4 Sharpie fine point pens are about 5 to 6 bucks which makes each pen around $1.50 or so. Not bad, what can I say; it's a damn near perfect pen.
Sharpie Pen Fine Point Pen , 4 Black Pens (1742661)

If you want an alternative to this pen I suggest you try the Stabilo Point 88 Fine Black . It meets all of the criteria at around $1 each, you can't beat it. It feels a little thin in my hand, It's long like a pencil and bleeds a little, but the ink quality looks good, and overall it's a very good pen for outlining your comics. That's German engineering for you!


6) Heavy Black Coverage: Once you outline, you'll need a pen that you can cover large areas in black that looks consistent for heavy shadows etc… It comes back to Sharpie for me, for this I use my 1, 2, 3, punch above on my Sharpie chart. The blue tape in the first image is my own method of keeping track of the newest pen with the best tip. If you've ever used these pens after a little while they start to dry and, or get a little mushy. They are still very usable, but if you want that crisp edge than you need a new one, hence the blue tape.

7) Varied Line Wwidth: You’ll occasionally need a brush pen for feathering lines from heavy to thin and back again. This is an amazing pen. I truly love this pen. It feels great in your hand, the brush stays firm without spreading out and you have a large and small tip at your disposal for whatever you need. The one thing about this pen is that it takes a little getting used to because of the tapered tip. You truly can cover large areas or with a twist of your wrist, or whip it into a fine hairline. It is a little mushy compared to the hard tipped outlining pens above, but with a little practice you'll love it. This is the Uni-ball Double Sided Pocket Brush Pen - Fine& Medium PFK 205. At $3.30 each, it's a steal.


8) Superfine detail: You will also need a super fine needlepoint type pen to get into some serious detail work. I use these for hair, fine shadowing and minute mechanical details as well. You will definitely like the level of detail you can get with this pen, it has solid ink flow, without many start and stop problems, but the barrel feels a little cheap in your hand, overall you'll love it.

The Pilot Hi-Tec-C Gel Ball Point Pen, 0.3mm Extra Fine, Black.  is one of the most amazing needlepoint pens you will find anywhere. This pen is around $1 each if you buy them in a 6 pack. This is a Japanese import, so the prices might vary.

I know it seems a little pricey, but there is a great alternative. The Pilot G-Tec-C Gel Rolling Ball Pens, Ultra Fine Point, 3-Pack, Black Ink (35483) This is the exact same pen as the Hi -Tec-C, it's just made for the U.S. Market.

9) Correction/White Ink: You’ll need white out or some method of covering over your black ink. It’s not just for mistakes, although mistakes are a great learning tool. You must think about your drawing as a building up process. You can’t create a masterpiece in one step, it takes a steady build from the outline to final touch ups. So, for this and some special effects I use a range of white ink products. Here are several, the first one is Pentel Presto! Flat Barrel Correction Pen, which is great for large coverage areas, or overdrawn lines. It’s unfortunate that Bic White-Out brand doesn't do the job for comics and graphic novels because White-Out was the only brand I really grew up with. Anyway, the next two are finer tipped white ink which is good for a range of different uses. Experiment with them on black and you’ll see.


Above is the original drawing of lighting which I added white ink to, feathering out the lighting giving it more of a stylized look. I purposefully didn't adjust the contrast so you can see where I drew in the white to cover up lines and where I added to the black ink. The image on the right is the finished page.
10) Erasers: I use several different erasers for several different things. Just about every drawing implement that you have will rarely do everything that you need. Most drawing tools are highly specialized to do one thing really well. Therefore, you’ll need several different things to get the entire job done.

I use a vintage Koh-I-Noor Rapidograph Electric Eraser Model #2850C, it’s big, bulky, powerful and erases everything, it's like freaking paper drill. I personally love it, especially for my blue pencil touch ups. But here is a newer electric eraser model Koh-I-Noor Battery Operated Eraser, Lightweight, Latex-free, 1 Each, Silver (EB-1200) that is less expensive and less bulky, but I have had this one for many years and it works great.
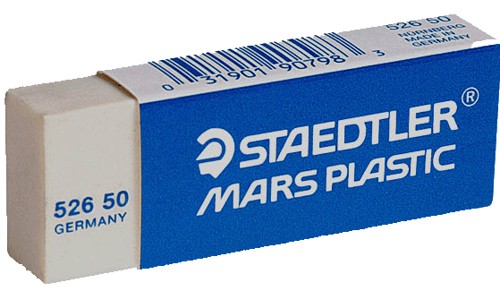
I also use the Staedtler Mars Plastic Erasers,Pack of 4 (52650BK4) , also made in Germany. I use a lot of these, and they are great. They are pure white, non-streaking or crumbling, and they will erase almost any line.

I use a Large Kneaded Eraser 2 Pack , which is almost like pliable putty. You can stretch it into almost any shape for hard to reach areas and it has ultra soft erasing for delicate fixes.


The illustration above has no eraser cleanup yet, and you can still see the blue pencil lines. The page layout on the right is cleaned up and finished. You can really see the difference a good eraser makes.
11) Light Table: This is an essential part of your drawing studio. There are some very reasonably priced light boxes out there. Here is one example: The Artograph LightTracer Light Box 10 in. by 12 in


There will be many times you need to make alignments on a page, or copy one portion of your drawing to the next page. Traditional animators use a light box extensively. There is nothing wrong with tracing your own drawings, it's not cheating it's art.
12) Rulers: Through most of the drawing process you'll need some type of ruler for straight lines. I used a wooden ruler for years, a T-Square and then finally more sophisticated rulers. Typically, you need a straight edge. You might need one that is curved, and one that is flexible. Here are just a few that can be found in your local art supply store or online.


The flexible rulers come in very handy when you are on the go. I stick one in my drawing pad as a bookmark.
13) Templates: This is another essential for your studio. The whole process of making sequential art is very time consuming because of the numerous steps involved. If you can reduce some of those steps and cut a few corners that's what it's all about. The great American comic book artist Wally Wood once wrote: "Never draw anything you can copy, never copy anything you can trace, never trace anything you can cut out and paste up." He was all about efficiency. Templates are used by architects and designers all around the world. They are extremely useful. Most of them can be purchased from your local art supply store.


14) Tape: Masking tape is very useful for a number of things. When I start the storyboarding process for my graphic novel, I use tape to place everything on the wall. For me it's all about the big picture. Sometimes when you are drawing page after page, you want to see it all together in order. This also allows me to move pages around to see if one scene works better somewhere else. The second use is inking, After I cut a page out of my sketchbook, I tape it to my drawing table securely so it doesn't move around. Blue and Green Masking Tape are not as permanent as the regular stuff. It's no fun ripping a page in half trying to remove it from your drawing table.


15) Paper: This is a big one for comic book artists; most comic artists will tell you that they use pre-made drawing boards such as Bristol or comic book drawing pads that are available on the market today. I’ve drawn with these boards and I have to tell you, there isn’t much I can’t do with my sketchbook that I can do with boards. Here’s the thing, drawing boards are big, not very portable, and hard to scan because of their size. Most computer scanners are only meant to go up to about 11 x 14, that is why I use Artist Series Sketch Book, 11"X14" Hard Bound sketchbooks to draw my comic books or graphic novel on. The paper quality is great, they’re portable so I can draw anywhere, and when I’m done I can easily scan it, to layout my book. Some artist would complain that ink bleeds through the paper. Not too much, I leave one blank sheet in between each drawing and move on, and the price is right too. The end result looks just as professional as anything from Marvel or DC. Whatever you use, be consistent. Don’t change paper midway through your story or you will see a noticeable difference.


16) Pencil Sharpeners: If you own a pencil than you must keep it sharp. I use both electric and portable sharpeners.


Boring pencil sharpeners are no fun try to find something interesting, why be boring, you have to look at it all the time, sitting there on your desk. I just picked up this little lunar lander pencil sharpener for my desk.
17) Xacto Knife: This is another must have, for cutting your comic pages out of your sketchbook when you're finished.

18) Computer: You have to have a computer to layout your story and pages. It doesn't matter if it's a Mac or a PC, you can use either one.
19) Flatbed Scanner: A flatbed scanner is another essential piece of your studio. After you have all of your beautiful artwork done, you must be able to scan it and lay it out page by page, add all of your lettering or digitally paint your comic book or graphic novel. I'll cover this whole process later on. Here is a simple hi-res scanner from Staples that will do the trick for a reasonable price.
20) Editing Software: My first choice is Photoshop. It's what I was raised on, I have used Photoshop from V.2 all the way to present, and that is a long time. However, Photoshop is a very expensive program in its current versions. I am happy to say that Adobe has released a free legacy version of photoshop CS2 to download. http://www.techspot.com/downloads/3689-adobe-photoshop-cs2.html. If you can't afford the newest versions of photoshop, then try these other options. There are great reviews about them online and they are free too. http://gimpshop.com/ or http://www.photopos.com/ Everything I’ve read about them seems very similar to Photoshop.
21) Coffee: Well, coffee cans to be more specific. I use a ton of coffee cans to hold and organize all of my pens and pencils, brushes, etc... And yes, I drank the coffee that was in them. You may need that too once you start drawing your own graphic novel.
21) Coffee: Well, coffee cans to be more specific. I use a ton of coffee cans to hold and organize all of my pens and pencils, brushes, etc... And yes, I drank the coffee that was in them. You may need that too once you start drawing your own graphic novel.


Social Plugin